Until now.
I may have found something that rivals her Churro Cupcake. Behold...the Creme Brulee Cupcake.
I can thank my hair dresser for this one. We have a fair trade system (not actually that fair at all) between us - she does my hair/and or nails, I make her whatever she wants. I obviously get the better end of the stick, but she seems to think that she gets the best deal so we'll leave it at that. This time around her request was either cupcakes or creme brulee, whichever I felt like making. Knowing that Pinterest has a recipe for virtually anything I type in the search bar, I looked up Creme Brulee Cupcakes and sure enough, there it was. The recipe I used came from here. I had a feeling these were going to be good based on the recipe reviews, but I wasn't sure how good.
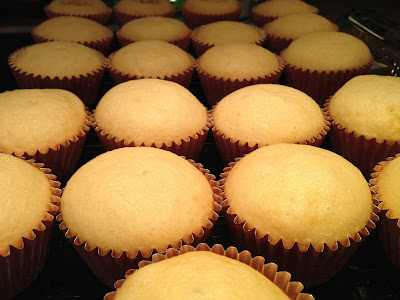
Lets start with the cake, this part was easy.
Pretty regular cake ingredients, with the addition of a few tablespoons of caramel syrup. This made the cake a little dulce de leche-esque. Once it was baked it actually tasted a lot like a sugar cookie.
Next step was to hollow out the insides to make room for a ridiculously good cream filling.
Most cupcakes that have a filling usually have a small portion of the cake removed and just a bit of the filling squeezed in there. Since there wasn't going to be a frosting on top of the cupcake I didn't hold back on the size of hole I carved out.
Figuring out how to get the innards out in a clean way actually turned into somewhat of a science project. Good thing I have these giant kitchen tweezers to help me. And for anyone that needs to do this, icing tips were a huge help. If you press it (bigger end down) into the middle of the cupcake and twist it around when you pull it out the cake should stick inside of the tip and leave you with a nice hole. However, if it doesn't stick, this is where the kitchen tweezers were handy.
All of my cakes hollowed out and ready for the cream filling. And this is where I got frustrated. The filling is a Swiss meringue buttercream. In short, you just make a meringue with brown sugar instead of white, and then switch your mixer to the paddle attachment and add tons of butter and beat it until it turns into a frosting. Sounds easy enough. Let me tell you, it wasn't.
First, I realized that I was out of butter. I had margarine but that wasn't going to cut it. It's called buttercream for a reason. So I ran to Safeway and grabbed some butter. Then, I made the mistake of separating all of my eggs into one big bowl. I should have done them one at a time in a smaller bowl and then poured them into the bigger bowl after each one. This is because on my fourth and final egg, the yolk broke, ruining the rest of my egg whites. I tried to salvage it but after I started whipping them in the mixer I realized it just wasn't going to work. Not much room for error when you're making a meringue. It was about this time that I realized I needed more eggs, so back to Safeway I went. This time around I didn't make the same mistake with the egg separating and I was glad about that since I ended up breaking a couple more yolks.
I got my
whites prepared and pasteurized them with the sugar in the double boiler
and threw them in the mixer. This time I had perfection.
I added the butter 2 T at a time just like the recipe said and I slowly watched my light fluffy egg whites turn into a deflated wreck. The frosting shrunk to about half the size it was and it appeared chunky and curdled. The butter was room temperature just like it called for and I could not figure out where in the world I had gone wrong. I was just about to scrap this batch and start again before I decided to watch a couple of youtube videos about how to make Swiss meringue buttercream. Yes...they have instructional videos on those kinds of things. I was so happy to hear the lady say "If it starts to look curdled, you're on the right track! Just keep beating it awhile longer and it will come back together." So I gave it a shot, and sure enough, it came back together.
 |
| Filled each cupcake to the brim with cream |
 |
| Topped them with sugar and did some blow torch action |
 |
| Great success! |
I heard from multiple people that these were the best cupcakes they've ever had in their life. And after all the frustrations I went through to get them done I'm glad they turned out to be a crowd pleaser. The good news is, the next time I make them I'll know exactly what not to do. Also, I'm willing to take the Churro Cupcakes on head to head with these bad boys. All blind taste testers are welcome.


