Sunday, December 30, 2012

Wandering to Seattle

I took my name 'Wandering Cook' a bit literally this past week and wandered up to visit my older sister Rebekah in Seattle. She needed a ride back up there after Christmas, so I agreed to it as long as I could stay at her place for a few days rather than driving straight there and straight back. (I have the freedom to do those kinds of things now that I have a real grown up job complete with Winter Break.) She would be working during the majority of every day that I would be up there so I would need to find something to keep myself occupied. She just moved very close to downtown so the first day I was there was spent wandering around the city in and out of stores and coffee shops until my legs decided they'd had enough walking. The next day I told her I would make her some dinner that would be ready after she got off work. For Christmas I had received all kinds of new things that my cupboards were lacking, such as a few pie plates, a mini pie mold, a nice bamboo rolling pin, and an awesome silicone pastry mat to roll out pie dough on with measurements printed on it so I can how big of a circle I need to roll out depending on how big my pie pan is. I realize that not everyone  would be as excited to rip the wrapping paper off of a pastry mat on Christmas morning as I was, but anyone that is into baking should definitely own one of these. In lieu of all of my pie baking supplies, we decided chicken pot pie would be a good idea for me to make. We discussed using the mini pie molds, but opted for the 10 inch full pie for the two of us because we knew it wouldn't go uneaten. I learned how to make mini chicken pot pies during "Townie Mom's Pie Class" but had yet to tackle a full sized one. But I figured with my new supplies it would be cake...or pie. (That was a mom joke, but I couldn't resist.)

The downtown city-living was awesome. The views are beautiful, I could walk downtown in 8 minutes, or to Pikes Place in 15, and options for what to eat for lunch are endless. The only downside I could find was the size of the apartment. The kitchen in particular. Here is what I had to work with:


Believe it or not, this picture actually makes it look bigger than it actually is. That refrigerator went up to my chin, and to say counter space was lacking was the understatement of the year. You'll also notice no dishwasher, so I was constantly cleaning dishes as I was using them because I had no where else to put them. I made it work though.

I haven't been able to master a pie crust on my own yet. The Thanksgiving apple pie turned out to be somewhat of a disaster that my mom had to come over and fix before I could even roll it out. After that though, I felt pretty confidant that the next one I made would be right since I now knew everything not to do. I used the most basic pie crust recipe in the world (3 C flour, 1 C shortening, 1 t salt and 1 C water). I didn't end up using the full cup of water because I thought the consistency looked about right and I didn't want to over water it, so I wrapped it up and stuck it in the fridge for a few hours while I prepped the filling.

For the filling I did equal parts flour and butter (about a 1/4 C of each) a can of chicken broth, a can of cream of mushroom soup, about 6 yukon gold potatoes diced up, a cup and a half or so of frozen peas and carrots and a whole chicken chopped up. I thought about using a couple of raw chicken breasts and cooking them and following that whole process, but for the same price we could get a whole chicken, already cooked. Considering the kitchen I was using, I thought I deserved to cheat a little on this one aspect.


Here is a snippet into the type of counter space I was working with.

I finished the filling a couple hours before I needed to start baking the pie, so to avoid soggy crust I stuck the filling in a bowl and put that in the fridge along side the pie dough that needed to be rolled out. When the time came, (the time being 11:00 at night after Rebekah was done with work and back home) I started rolling out the pie crust. I was pleasantly surprised with how easily the crust rolled out. It was smooth and elastic and easy to work with. Finally a crust that wasn't crumbling before I even tried to roll it!


Here is the bottom crust rolled out and pressed in the pan. You'll also notice my awesome rolling pin and pastry mat underneath the pie plate. And in case you were wondering where I found the counter space to roll this out, the answer is: I didn't, I cleared off the coffee table in the living room and used that.

Loaded up with the perfect amount of filling
Top crust on - ready to bake!
Finished product

Things were looking and smelling good when it was finished. I wasn't sure how the oven was going to work since it was probably installed in 1954, but I didn't burn the crust or the apartment down so that was a win in my book. We cut into it close to midnight and it turned out even better than I had expected! It came out of the pan cleanly, crust was flaky and the consistency of the filling was spot on. 

Artistic side shot
As an added bonus, I had been busy making a coconut cream pie all day for dessert. It had a coconut gingersnap crust, vanilla coconut custard filling and topped with whipped cream and toasted coconut. Here it is looking like George Washington during the whipped cream process:


We did end up just about finishing both pies by the time I left a few days later, and I learned a couple of things during this trip. One, I can make pie crust by myself now, and two, I appreciate the room in my kitchen so much more after cooking in that pin hole of a kitchen.

Sunday, November 18, 2012

Edrie

It's a known fact that every little girl dreams about their wedding day. Their Prince Charming, the dress they will wear, the colors that will be chosen and the flowers that will be held. It is perhaps a lesser known fact however that little girls also dream of the day they get their very own KitchenAid Mixer. For as many years as I can remember, I have theorized that a kitchen isn't complete until it has a KitchenAid sitting atop the counter. I am happy to report that as of this week, my kitchen is complete - and it was Kyle (my very own Prince Charming) that made this happen as a late birthday/early Christmas present.

It was the day after I received this gift, this passed week, that my grandma Dorene lost her battle with cancer. Up until her final days she was one of my blog's biggest fans. She was one of the first ones I sent the web address to, and she was instrumental in encouraging me to make it public to share with the rest of the world. She really enjoyed reading it, and I will truly miss sending her the link each time I write a new post and waiting for feedback via email or phone call.

Now I don't know if this is just something my family does, or if it is more common than I may think, but we like to name our mixers, just as young boys name their first cars. The mixer is such an important part of the kitchen, it just deserves to have a name. I saw it only fitting that in honor of my grandma, my mixer be named after her. Her full name was Edrie Dorene McNulty. She hated the name Edrie and chose to go by Dorene, but I actually like the name Edrie, and it fits my mixer a little better than Dorene does. Now everything I make will have a piece of her baked into it. She has always supported my cooking, and though she has passed, I will be reminded of her support forevermore.

Grandma in the kitchen

Edrie in the kitchen

Saturday, November 10, 2012

Butternut Squash Cream Sauce

I guess its been long enough, its time for me to post again. I actually really like this whole blog thing because unlike school, I can write when I feel like it without being docked points for grammatical issues...or turning it in late. I really haven't made anything this passed month that was blog worthy anyway besides the tiny pumpkin pies, which I will still get around to writing at some point. I have been planning this meal for over a month now but I needed to find the right audience to make it for. Not something I would want to make for myself, not something Kyle would have been interested in, and not something my sister wanted last time she was home. So when one of my friends, who isn't too picky (when it comes to vegetables) wanted to do dinner, I knew this would be a good opportunity. I also invited my mom, knowing that she would appreciate just about anything I made.

Last month while wandering around at World Market I came across this:


Little pastas in the shape of pumpkins and leaves! Since its no ordinary pasta. it had to be paired with an un-ordinary sauce. Spaghetti or alfredo sauce just wasn't going to get the job done. I got to thinking, and thought that a butternut squash cream sauce just might do the trick. Squash and fall just go together so this seemed like the perfect idea for my fall harvest pasta.  I've never really had anything like that, but I figured someone had to of tried it before and there must be a recipe somewhere on the internet. Sure enough, I googled it and came up with about 2,500 different options. They didn't all seem to be quite what I was looking for though, so I settled on one that was adapted from a pumpkin cream sauce recipe by Rachel Ray. The adapted recipe can be found here.

First thing was first: slice the squash in half lengthwise and scoop out the inside. Seemed easy enough. However, after a good 10 minutes of battling with it, I ended up with a semi-mutilated squash and a sore wrist. I literally had an easier time carving Professor Snape in my pumpkin with a tiny knife.

Not the cleanest cut, but it got the job done

Next step was to place both halves cut side down on a roasting pan and slap them in the oven for 45 minutes at 400 degrees. I'm not exactly sure what a roasting pan is, so I got out a cookie sheet, put some foil down on it and called it a roasting pan. After it was done I was happy to find a couple of soft squash pieces that didn't stick to the foil and scooped extremely easily out of the shell. I scooped them into a bowl and pureed them with an immersion blender. My mom, who was at my house by this time insisted that an immersion blender probably wasn't the right tool to use, but I did it anyway, and it turned out just fine...

Pureed version of squash.
 I like squash, so I liked the taste and texture of it at this point. It was a lot like baby food, which is apparently something I like. Next, saute an onion over medium heat with a couple tablespoons of butter, salt and pepper. Once the onion is cooked add the squash and a cup of half and half. That will start to boil and then add a half of a cup of parmesan cheese. At this point I also added a teaspoon or two of dried sage.

Don't you just want to eat that by the spoonful?
Once the cheese melts, its done! Add your cooked pasta to the pot and combine them. And don't forget extra cheese on the side.

Finished product
The bread that I fixed was homemade as well, but I'll save that for another posting. And just as I suspected, I picked the right crowd to serve this to. I had three empty plates to clean after dinner, a full stomach and new recipe to add to my repertoire. 

Saturday, October 13, 2012

Gang Up Volume 2

I wanted to get this published earlier in the week but life got in the way and I haven't had much of a chance to sit down and write until now. After serving my gang-up dish last Monday, I wanted to follow up with the dish my mom came up with for anyone who in interested. Besides, she gets mentioned enough throughout my posts I figured it was time for her to be in the spotlight. Her face when I put my plate down in front of her on Monday looked slightly shocked. She told me it was eerily similar to what she had planned but wouldn't tell me what it was. So on Tuesday night, I sat down and this is what wound up in front of me...


I know it doesn't really look anything like mine, but the concept is similar. Mashed potatoes with the beef and sauce served over the top and bread on the side. The difference is, I made a joke about my bread being made out of barley and potatoes and hers really was. I guess as far as competition goes, she has a one-up on me there. She called this dish "Beef Ragout with Mashed Root Vegetables & Potato Barley Flatbread" Not sure what Ragout directly translates to, but I'm going to guess "stewed beef in a chunky tomato sauce." She used all 10 ingredients and added an onion and an egg. The onion was used in the mashed potato mix-up. It was mashed potatoes and turnips with caramelized onion. The addition of the onion was a good choice - these were good. The pumpkin went into her Ragout, but I don't know any of the specific details on how this was put together. All I know is that it was put together well. The flat bread was an interesting addition to the meal. It tasted a little bit like a cream of wheat cracker if you can imagine that. The fact of the matter is, it was made using only the ingredients allowed so that in itself is impressive to me. She ate more of the flat bread the next morning toasted with jam. So it looks like she got a couple of meals out of this. So versatile!

Normally we make a competition out of this complete with judges and scoring sheets but we didn't go to that trouble time around. My brother ate mine but I don't think he had a chance to taste hers. So just because she made homemade barley potato bread and used a fancy French title AND got breakfast out of it the next morning, I'm going to go ahead and say its still up in the air as to who won this one.

Her friend Deb, who put this whole thing together wrote up a blog presenting all of the final results. It's kind of interesting to see what everyone was able to come up with using the same ingredients. If you are interested, check that out here! Gang-Up Challenge Results

Monday, October 8, 2012

Gang Up Challange

Something that my mom, sister and I have been involved in throughout the last couple of years is what's called the "Gang-Up Challenge." It started on Allrecipes, where my mom and many of her proclaimed "AR friends," as well as anyone else on the website who wanted to participate would partake in a friendly cooking competition. I don't think it was meant to be a competition at all, but between the three of us we always made it that way. The premise of the competition is that 10 random ingredients are suggested by those who decide to participate. Once the ingredients have all been decided on participants must make a dish (or a meal) containing all 10 ingredients. 2 changes may be made (omitting 2 ingredients, adding 2 ingredients or omitting 1 and adding 1.) Water, salt and pepper are always freebies. Long story short, this competition doesn't take place on Allrecipes any longer, but my mom and her friends wanted to keep the tradition going amongst themselves so they decided to set one up for the month of October, and of course I wanted to play along.

The list of ingredients that was decided on is as follows:
Beef (any cut)
Potatoes
Pumpkin (my contribution)
Tomatoes
Red Wine
Beef Stock
Sage
Oil (olive or canola)
Barley
Turnips

This time around was obviously no "Chopped" competition, all of the ingredients are pretty coherent. No marshmallow cream or Lucky Charms to throw me for a loop. The set up was there for me to make some kind of Beef Barley Stew, but I wanted to try and come up with something slightly different. I had to work all day today so I decided to call upon my crock pot to get the job done for me. I omitted the barley and added butter. And my final product was...

12 Hour Beef and Turnip Roast with Pumpkin Mashed Potatoes 

...or "Fall on a plate" for short. The fact that it literally cooked for 12 straight hours deserved a mention in the title.


You'll notice the bread in the background. No I didn't bake that out of barley and potatoes. Call me a cheater, but I just thought bread would be a nice addition to the meal. Here is how I made it:

Around 6 o'clock this morning I put most of it together before I went to work. First thing I did was get out a pan and sear all of the sides of my roast in olive oil. I ended up using a chuck cross rib roast (or something to that effect) Normally I coat the roast in flour before doing this but flour wasn't one of my ingredients. This makes a crust on the meat and seals in all of its juices...from what I hear. Then I stuck it in the crock pot and added 3 C of water, 2 t beef stock, half a can of diced tomatoes, about 3/4 C red wine, salt, pepper, and sage. I set it to cook on low and went to work. When I got home I started my potatoes. Just peel them, dice them up and boil them in a pot of salt water. When They were fork tender I drained them, added a can of pure pumpkin (not the huge can, just the normal size one) and a half a stick of butter. Then used my mixer to whip them up. These actually turned out as good as I had hoped they would. I'm glad I thought to do this, because I'd like to make them again. Around an an hour and a half before serving I added the turnips to the crock pot. I've never cooked with turnips before, and frankly I didn't know how to handle them or what they even taste like. I peeled them and used my mandolin to slice them up thinly and threw them in the pot. They also came out as good as I had hoped...kind of had a carrot taste to them. My mom came over for dinner at 6 and I put it all together on the plate. I was pleasantly surprised with how well everything turned out. If this meal isn't the epitome of Fall on a plate then I don't know what is. My mom will serve hers tomorrow night and hopefully it isn't exactly the same as mine. Otherwise that will pretty much nullify all the creativity that I thought was using. 

Saturday, September 22, 2012

Micro-Cake

I may have discovered one of the greatest things. You know when you want dessert, maybe some cookies or cake but you don't want to take the time or energy to make it? Maybe that's just me...but I saw a bunch of recipes for desserts made in the microwave, in a mug, and they have become my latest obsession. I found a million different recipes for different versions and I want to try them all. (Disclaimer: realistically I found more like 13, but I still want to try them all.) So far the only two that I have actually tried are the chocolate chip and peanut butter cookies. Here is my documentation of tonight's rendezvous:

I opted for the peanut butter cookie version.


Grab a mug and add a tablespoon of butter and a tablespoon of peanut butter. (For the chocolate chip one the directions are going to be exactly the same minus the peanut butter) Put this in the microwave for about 14 seconds or until the butter has melted, then mix it up to combine the two.


Next add a tablespoon of brown sugar, a tablespoon of white sugar, a pinch of salt and a couple drops of vanilla. Stir these together.


Add an egg YOLK only. Then stir this up, it'll be pretty soupy.


Finally, add 3 tablespoons of flour and mix it all together. It should form a ball of dough in the bottom of the mug. At this point you would add chocolate chips if you were going that route.


I added some chopped peanuts on top of mine for a gourmet touch...because this is obviously one of the most gourmet cookies I've ever made.


Stick it in the microwave for 35-45 seconds. The closer to 45 seconds you get the more dried out it will become. I opted for about 37 seconds because I like mine to be pretty soft and doughy on the inside. This is a personal preference for sure. If you're making chocolate chip it stays in for 45-60 seconds. I'm not sure why there is a difference but I would guess it has something to do with the peanut butter. Again, I like mine on the softer side so I go about 46 seconds.


It's not even close to complete unless there is a nice scoop of vanilla ice cream on top. And there is one of the fastest, easiest, most awesome desserts in the world. One of the best parts about it is that the only dish left to clean up are the mug and spoon, or fork, or spork. Next up on my list of recipes to try is the microwave apple crisp or coffee cake. I'm telling you, the possibilities are endless...


Unlike my peanut butter cookie.

Tuesday, September 18, 2012

Soft and Gooey Cinnamon Rolls

Here we are halfway through September and its still 90 degrees outside...no exaggeration. Yesterday I was looking at the weather section of the newspaper and it seems like the only other places in the world that are still this hot are Cairo and Dubai. I am in denial about the weather and therefore I dress like its 70 degrees out. Then I spend the day sweating and complaining that its too hot. In addition to my clothing, I've been cooking as if summer is long gone. Nothing says fall like waking up to homemade cinnamon rolls, which are my latest endeavor.


I got this recipe from my mom, who got it off of Allrecipes. You can find that recipe here. I've made them twice already this week, once as a morning birthday breakfast and once again as a midnight snack/breakfast for Kyle, who is the king of all things cinnamon-y. My favorite thing about this recipe is that it makes a couple dozen, and you can assemble them and keep them in the fridge for the night (or  bake half) then bake the rest off in the morning. If you're like me, you'll enjoy them at 1 in the morning and again at 1 in the afternoon for breakfast. Lets get started. 


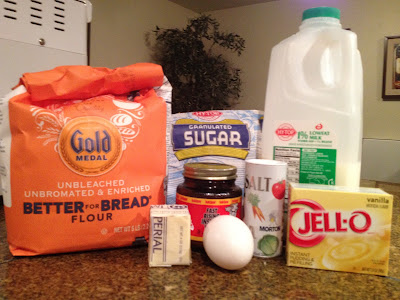
Here are my ingredients for the dough. You'll notice the box of instant vanilla pudding. That's the secret ingredient, which really isn't very secretive at all anymore. Throw all of this in the bread machine (or Kitchenaid if you're cool enough to own one) and let it do its thing on the dough setting.


After about an hour and a half it comes out looking like this. This is probably some of my favorite dough I've ever worked with. I mean, I'm not any kind of dough connoisseur and I've only worked with a couple in my life but this one definitely tops the list. Its really soft and, doesn't stick to everything and it rolls out very easy. 


Here it is all rolled out. You'll notice another hunk of dough in the background. That's because I like to cut it in half and roll out one at a time...mostly because I don't have a surface big enough to roll out the entire thing. You'll want to roll it into a rectangle, and I'm still not sure I have the length and width proportions right. If its not wide enough you'll end up with tons of little tiny rolls in the end rather than big ones. I guess that's kind of a personal preference thing though. 

 
 The next step is to lather on the cinnamon filling. It's made up of butter, cinnamon and brown sugar and tastes like...something so good I can't even come up with words to describe it. Maybe I should try spreading that on some toast? I like to put on a nice thick coating so that it doesn't all disappear once they've been baked. 


Like I said earlier, I can't quite figure out my length/width proportions. As you can see, I have a rather long skinny roll. The only thing that is going to affect is the size of the roll - no taste is compromised. 


Measure about 1 inch wide pieces to cut off of the roll. This picture turned out blurrier than I thought. It was after midnight when I made these so I guess my eye sight started to go. 


Arrange them in a greased pan like this. Its okay if they are pretty close together. They'll bake into each other but that just makes them more gooey and less dried out, which is the way I like it. They should sit out like this for at least another half hour before they go in the oven to give the dough a chance to rise up again. Or into the refrigerator for a slow rise over night. They bake at 350 for 15-20 minute. 


Hot out of the oven, apply the icing (powdered sugar, milk, vanilla and butter) which will melt all over the top of these. They are extra soft and gooey. I really don't like the word gooey at all except to describe cinnamon rolls and even then I don't particularly like it, but it seems to be the only word that gets my point across. And there you have it: the best, and only, cinnamon rolls I've ever made from scratch! 

Monday, August 27, 2012

Grilled Cheese Rolls

A couple of days ago on my way to work I stopped at Trader Joe's to grab something to eat. While I was checking out, the woman working looked at me and said, "You must be a good journalist!" I looked at her with a little confusion on my face and repeated, "Journalist?" Just on the off chance that I misheard her. She said, "Yeah, do you do any writing?" I thought for a second and answered, "As a matter of fact, I do write a food blog." Then she smiled and said, "You keep writing that, you are very good at it!"

Thanks Trader Joe's lady, for having confidence in my blog-writing abilities.

The end of August is nearing and I can actually feel a certain crispness in the air telling me that fall is here. Our short-lived summer season was nice while it lasted, but  its about time for the cooler weather to return to Oregon. Being the true Northwestern-er that I am, I am not entirely upset about the coming cool weather, and in fact I almost welcome it with open arms (as long as the rain holds off for another month or two). The fall has to be my favorite season out of the year. The weather is perfect as long as it stays dry, its football season, and the food is what puts the nail in the coffin. There is honestly nothing better than a warm meal on a cool night. You will probably notice an increase in posts during the next couple of months.


Today it's not cold out, but just cool enough and just grey enough for me to want to sit inside with a bowl of soup and grilled cheese watching HGTV in my sweat pants all day. These grilled cheese rolls are something I found on Pintrest. They are super easy to make and not fancy or gourmet by any means. They are just a fun spin on regular grilled cheese and good for kids...or 22 year old's who think they are still kids...


First thing is first, cut the crust off of a couple pieces of bread. I just used a soft wheat bread for mine.


Next, use a rolling pin (or a wine bottle if you don't have a rolling pin) to flatten the bread out. Then stick a slice of American cheese on each piece of bread. Yes, this cheese is gross, and it feels like plastic, but we all know it makes the best grilled cheese.


Roll them up tightly and they are ready to go into the pan. I just used a small frying pan with a little melted butter. Hold the roll in place for a few minutes until the edge is sealed and then roll it around to make sure it cooks all the way around.


Meanwhile I was heating a can of Progresso chunky tomato soup on the stove, and just like that I had an entire meal. Like I said, super easy to make, but fun to eat and the sticks are perfect for dipping in the soup! By the time I got around to making these the clouds had burned off and it had warmed up to almost 80 degrees. But thanks to my air conditioning I was still convinced that it was cool enough out to eat soup and sandwiches. I may be rushing into fall a little bit, but Safeway has Halloween candy for sale already, so it looks like I'm not the only one!

Monday, August 20, 2012

Summer Fruit Tart


Now that August is just about over, I'll go ahead and post my first entry of the month. I'd like to say that my posting consistency will improve once the fall comes along, but I can't make any promises. Rather than blogging I've been spending my time doing way more important things, like watching TV. It was the TV however that gave me inspiration for this post, so I guess it was a rather important activity after all. While Kyle and I were watching this week's episode of "Masterchef" we watched the creation of fresh fruit tarts during a head to head elimination challenge between contestants. (Kyle is my boyfriend for any who may be reading and wondering who he might be.) Kyle mentioned that he would like to try one of those fruit tarts some time, so I took that as an opportunity to challenge myself...and maybe earn a few brownie points in the process. Plus, I needed something to blog about again anyway. I wanted to find the most authentic and homemade version of the fruit tart I could. I looked through many recipes, sifting through "shortcut crust" and "vanilla pudding filling" and finally landed on a Fresh Fruit Tart recipe from Oprah's website. The shell is a legitimate pastry crust and the filling is a smooth homemade custard, or pastry cream. I had my work cut out for myself.

I started with the crust because it was going to need to chill for about an hour while I worked on the cream. One of the first instructions told me to use a food processor to cut the butter and cold water into the dry ingredients. Since I don't own a food processor, I listened to my semi-pro baker little sister who told me to use a blender instead. I wasn't sure if that was a great idea at the time, and in retrospect I'm positive that wasn't the best idea but I made it work. After the dough chilled I ended up with a pretty crumbly mess on my hands, in which I had to perform some Texas Chainsaw Massacre-like surgery on it. I pieced it together in the pan and ended up with a semi-descent looking crust by the time it was ready to go in the oven. The first 5 minutes of baking were supposed to include pie weights to ensure that the crust stayed in place. I used poor man's pie weights, which were dry kidney beans on top of parchment paper and that worked just find. After removing the beans, I stuck it back in for 20 minutes until I had a nice golden crust that didn't glorify my patch-work as much as I was afraid of.

Cooling inside the pan
While the crust was cooling, I started to work on my pastry cream. This is the second time now that I've made a pastry cream for the sake of my blog. I think that this time it turned out better, as I experienced more scorching last time. I also used a different recipe that I will probably stick to from here on out (omitting the cognac). I was supposed to strain it through a sieve, but I don't have one of those and there weren't any lumps that I could see so I put it straight in the fridge to cool.

Filled crust, still in the pan
All of the recipes that I read regarding fruit tarts showed the crust removed from the pan before they start filling it and assembling the fruit. While consulting my mom, the expert on most things food, she told me to leave it in the pan during the filling process. Since mom usually always knows best, that's what I did. I was afraid it was going to be too heavy and create a problem for me removing it from the pan after it was complete, but it didn't. Thanks mom.

Fully assembled, still in the pan
Here it is fully assembled. I chose to use strawberries, peaches, kiwis and blueberries because I wanted a good contrast between the colors. And since I was making this for Kyle in the first place, I chose fruits that I knew he liked. Besides blueberries, but that's why I put those in the middle, so he could avoid them if he wanted. Overall, I think that it turned out pretty well. After the crust mishap in the beginning I wasn't sure which direction this fruit tart was headed, but I can say that I was pretty proud of the outcome. For the record, Kyle ate almost the entire thing in one sitting, and brownie points were received. In the words of Gordon Ramsay, this was "the most stunning fruit tart!"

Monday, July 30, 2012

Cloud Nine

Yet again my hectic summer schedule has interfered with my blogging ability, and I am sure I have left oh so many of you checking frantically daily for a new post to arrive. Well, here it is! I have recently discovered Pintrest, and by that I mean I have recently become an active member. I had known about it all along but never really understood what the big to-do was until now. In the last few days I have discovered more blog-worthy recipes than I know what to do with. Looking through them was what inspired me to crank out a new entry despite the fact that I haven't had time to do so. So here I sit at work, blogging away yesterday's breakfast.

It was the picture of the recipe that first caught my eye. A light, fluffy pancake of sorts, with fresh fruits baked in, and topped off with a drizzle of honey. I could (almost literally) taste the summer flavors through the screen. Being a late July morning, it was the perfect time to recreate this summer breakfast. The recipe is called Honey Cloud Pancakes, and can be found here. They may look daunting, or maybe that was just me, nonetheless they are super simple to make. Next time I make this I won't even need to look at the recipe...and that may be as soon as tomorrow morning.


Here are my ingredients: Milk, flour, honey, vanilla, salt, 2 eggs (1 egg white and 1 whole egg) and fresh soft fruits. The original recipe used strawberries, peaches and blueberries and I didn't find any reason to make a change regarding fruits. After all, two thirds of them are my favorite fruits. In one bowl whisk the egg white until it becomes white and peaky. In a second bowl, mix the milk, flour, honey, salt, vanilla, and a whole egg. Then fold the egg white into the other ingredients using a metal spoon. I'm not sure why you are supposed to use a metal spoon but that's what the recipe said, so I figured its important and I should pass it on. At this point you'll want to have your fruit sliced up and ready to go because you're going to need it.


Melt 1 T butter in a 6 inch (oven safe) frying pan. The one I used probably wasn't oven safe at all, I got it for $4.99 at Winco. But the handle didn't melt and the pancake turned out just fine so this is the pan I'll continue to use. Anyway, melt the butter on the stove top and pour in the batter. Leave it on the stove for just a couple of minutes until you can see it starting to set up around the edges. At that point, sprinkle the fruit on top and pop it in the oven for 7 minutes. Once its done, it will have risen up a little bit and be a light golden color.


Because of the butter on the bottom it slides out really easily onto a plate. Drizzle some more honey on top and its ready to eat!


The name honey cloud was spot on. It was light, fluffy and not overly sweet, and barring the butter, it isn't half bad for you. The cool thing about this is that you can substitute any fruits or toppings you want to adapt it to the season. I plan on making this again multiple times this week. Its that good.

Thursday, July 5, 2012

Strawberry Danish


Its summer time (technically, but Mother Nature has little to show for it), which means fresh local strawberries are in season. I found a recipe online a few months ago for strawberry danish pastries that I had been wanting to try but hadn't gotten around to yet, so I figured this was a good time to so. The recipe can be found here. I followed the recipe almost exactly, except for the pastry cream - in which I used this recipe. Besides the pastry cream the other two ingredients are puff pastry dough and strawberries, so really it was the formula from the first recipe that I was actually following and not so much the recipe itself.

I made my pastry cream a day in advance so that it would have time to chill in the fridge. My days are usually packed pretty full of work and other various activities, leaving a 1-2 hour window of kitchen time - so anything that can be done in advance is extremely helpful. I unwrapped my puff pastry dough and set it out on the counter to thaw out for about an hour while I took a nap, which is one of my scheduled "other activities" that my day is so jam-packed with.  After I woke up  it was time to get to work.


The first step in the recipe involves draping the dough around a wooden dowel in order to cut even strips on either end, but I like to be a little rebellious sometimes and this was one of those times. (The wooden dowel approach seems confusing, so look the real recipe in order to see what I'm talking about.) Also, I didn't have an extra wooden dowel laying around so I just cut my dough into rectangles and then cut the strips one at a time trying to make them look as even as possible. It looks more rustic that way anyway. The only thing you really need to make sure of here is that there are the same number of strips cut on either side because these are going to be folded over on top of one another to create the braid effect. Each box of puff pastry contains 2 sheets of dough, which make 3 pastries each. The first two rectangles were easy to cut out - the third one required re-rolling scraps of dough in order make a large enough piece. Since I don't own a rolling pin and I was in ultra creativity mode, I cleaned off a bottle of flavored syrup that I had laying around and used that. I was pleasantly surprised with how well that worked.

Next, I spooned a few tablespoons of pastry cream on to the centers of each of the rectangles and topped them with a good amount of sliced strawberries. After tasting the finished product, I decided that I probably could have used more of the pastry cream than I did. Plus, I had over half of the recipe leftover.


Now it was time to braid the dough. It really is easier than it might seem, you just cross the strips over each other, alternating which one goes on top. There is probably a much fancier way to do this, but this method worked for me and it looked nice when I was finished too. There isn't anything sealing either end, so be careful when transferring the pastry to a baking sheet that the strawberries don't fall out of the ends.


6 pastries later, I lined them up on an ungreased baking sheet and topped them off with an egg wash to make them shine. The recipe didn't specify if the baking sheet should be greased or not so I took my chances and went without and didn't have any problems getting them off. I baked them at 375 for 35 minutes. When I pulled them out it looked like a murder had taken place in my oven. Strawberry juice had leaked from each of the ends, making blood red pools around each of the pastries. This didn't end up being a factor when removing them from the pan however.


You'll notice that some look nicer than others. This was due to the second sheet of dough being stickier than the first. I ate the one on the far right first so that no one else could see it.


And here is one of the nicer looking ones posing for a photo opp. They really did end up being pretty good, especially the next morning for breakfast. Like I said, I will add more cream to the center next time to add a bit more substance to the center. I may mess around with this recipe and adapt it according to fruits that are in season. I'm thinking a peach or raspberry version might hit the spot, or maybe a mixture of the two!